Decorative fence panels are my go-to solution for jazzing up an otherwise meh space. Easy to build, pleasing to the eye, and most importantly, long-lasting… Plus, they won’t break the bank.
If you have been following my blog for a while, you might know that I like quick and simple solutions for boring backgrounds. And these panels are no exception.
What I like about the panels is the variety in styles. There’s a lot of them, and for this project, I found these composite panels are a great way to spruce up a yard. You can hang these directly on a fence, frame them out, or build a new wall to create cool scenery. The options are endless!
Along with the front frame, I built a backside of the frame to house a ½”x6” exterior LED light. However, since the panels were on a bumpy surface, I noticed that the light was shining unevenly behind the frame and looked messy. Thus, I decided to add some self-sticking foam. This is totally an optional addition; depending on where you place it you probably won’t need to do this.
Here’s one way you can frame out these beauties to buff up your yard’s backdrop.
MATERIALS
(for 1 panel)
– 2 2″x2″x2″ (for the base frame)
– 2 2″x2″x4″ (for the base frame)
– 1 2”x4” composite hardwood decorative panel
– 6 exterior screws (for the frame)
– 8 black exterior nails (for the panel, color optional)
– 8 finish nails 16 gauge
– 2 2″x2″x2″ (for the front frame)
– 2 2″x2″x4″ (for the front frame)
– nails
– wood sealer
– Self-sticking foam (optional)
TOOLS
-miter saw, chop saw, or circular saw
– drill and driver
– speed square
– pencil
– tape measure
– finish nail gun and brad nails (or use screws as an alternative)
– Sander and sandpaper
1. Cut the wood for the front frame
This first step can be optional if you want your panels to have a front frame. If you don’t or if you want to keep the front, feel free to skip right to step two.
For this project, you can use any type of wood, but I would highly suggest an exterior-appropriate one, as it would resist the outside weather, be it direct sunlight, rain or others. In my case, I went for Redwood.
Cut the tip of the 2”x2”x2’ at a 45° angle with a saw. Then, you’re going to flip it, and cut the other end at a 45° angle, repeating this process until you build a 2’x4’ frame.
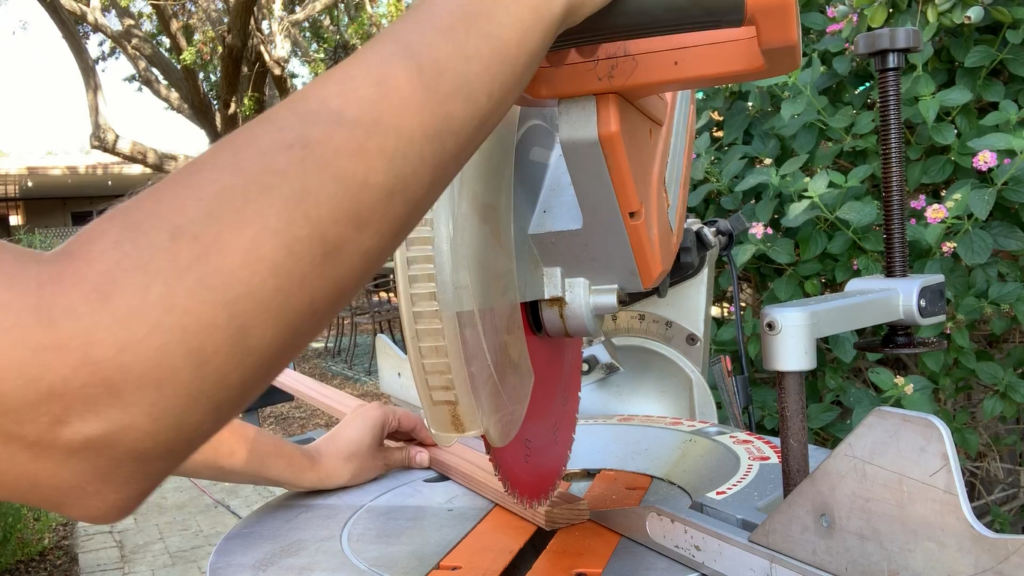
Circular saw cutting the wood 
2×2 cut at a 45° angle
2. Build the base wood frame
For the next step, use the drill and the exterior screws to build a separate frame that would attach to the back, with the 2”x2”. You could do a butt joint since it’s not going to be visible. Because of the dimensions of the wood, I used just one screw for each end, but feel free to use two for more support.
You can use a speed square to double-check that it’s perfectly square at a 90° angle.
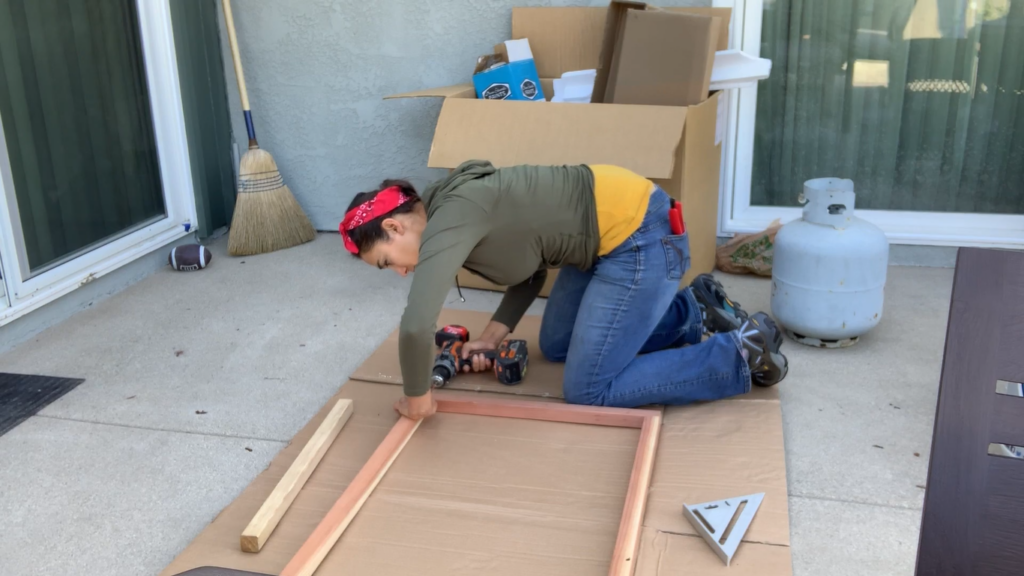
Butt joint with exterior screws 
Speed square for 90° results 
Base wood frame
3. Add the panel
Now that your frame is done, it’s time for the panel!
Lay it down on top of the wood frame and check that they align perfectly. Then, use the set of black exterior screws to set it down at all ends and in between for extra support. Make sure to not screw through where you have already screwed when assembling the frame. Also, check that the screw is completely flush so it won’t be visible.
As a side note, keep in mind that, despite these panels being really sturdy and long-lasting, if you put them in direct sunlight, the color might fade over time. However, it’s not something that can’t be solved with a quick paint or staining job. 😉
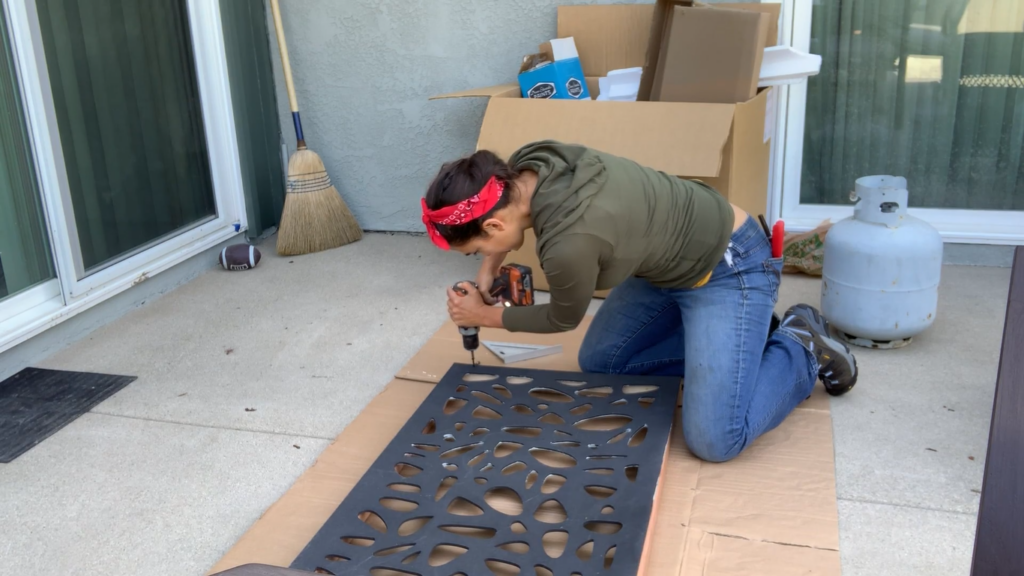
Exterior screws for the fence panel 
Adding the foam 
Fence panels placed
4. Add the front frame (optional)
If you decided to go with the front frame look for the fence panels, you can begin attaching it now. With the help of a nail gun —or a good ol’ hammer—, you can nail down the frame at each end with the finish nail 16 gauge. Obviously, you can use screws, but the nails will have a smaller profile.

Nail gun for the front frame 
Front frame attatched
5. Measure time
Now, with your panel —or panels!— built, you can begin measuring the area where you’re going to locate it. While measuring isn’t a must if you have just one panel, it’s always good to determine and mark before putting the nails or screws in. This, to prevent any crooked panel situation.
Also, if you have two or more fence panels, the spacing is entirely up to you. It all depends on where you’re going to place it and how you want it to look, but I’d recommend spacing them a little less than the panel width. In my case, I left an 18” separation between each of the panels.
Tip: if you don’t have a pencil, you can always use an eye liner lol.
6. Sand and seal (optional)
This step is a must if you want to help preserve the wood. Use a sander or hand sand it to smooth the wood —also known as “sanding”. This helps to get rid of the wood fibers, dust, and dirt particles that may have an impediment in obtaining a good wood finish.
Next, you can add a sealer or stain. As a result of this, the wood’s natural color will be enhanced and it will also be protected from the elements. You could also do this before you built the frame, which would do your job a lot easier, but I personally left this step for last because I wanted to wait until the end to see how the rest of the colors and the landscape came together.
Finally, you can put your fence panels in place and voilá, your yard now has a new striking backdrop!
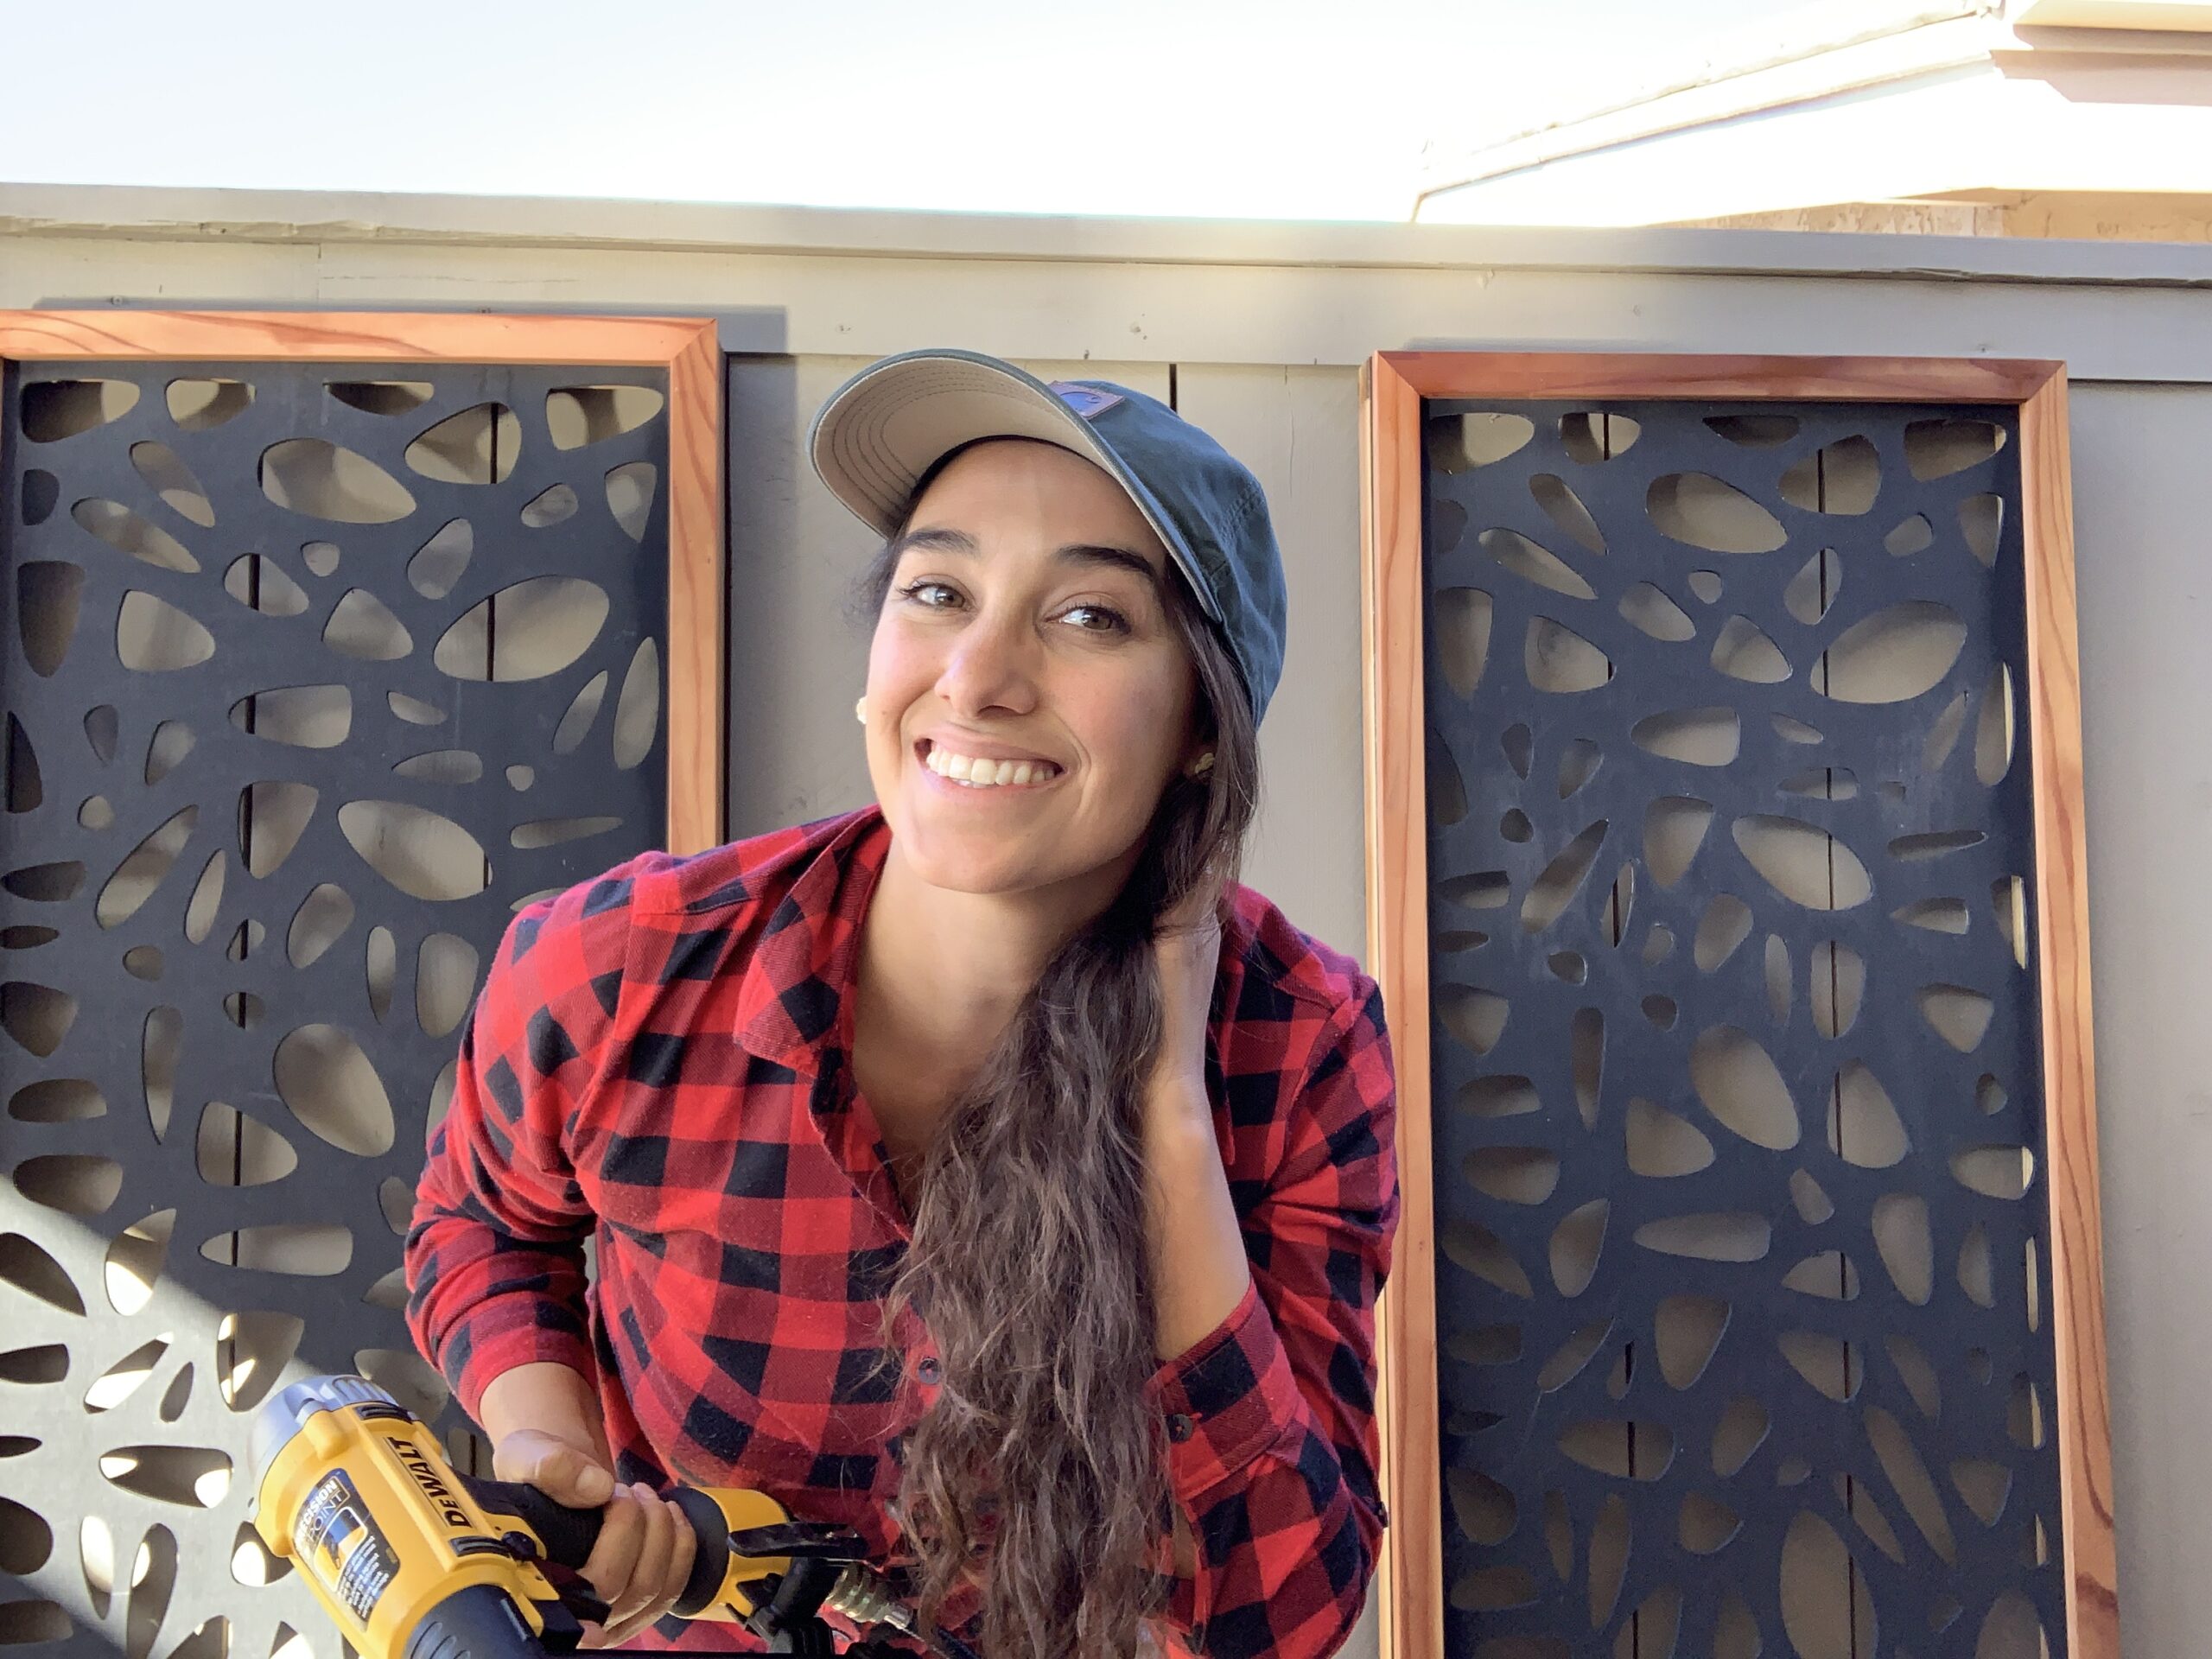
Sara & finished fence panels 
Fence panels 
Final backdrop