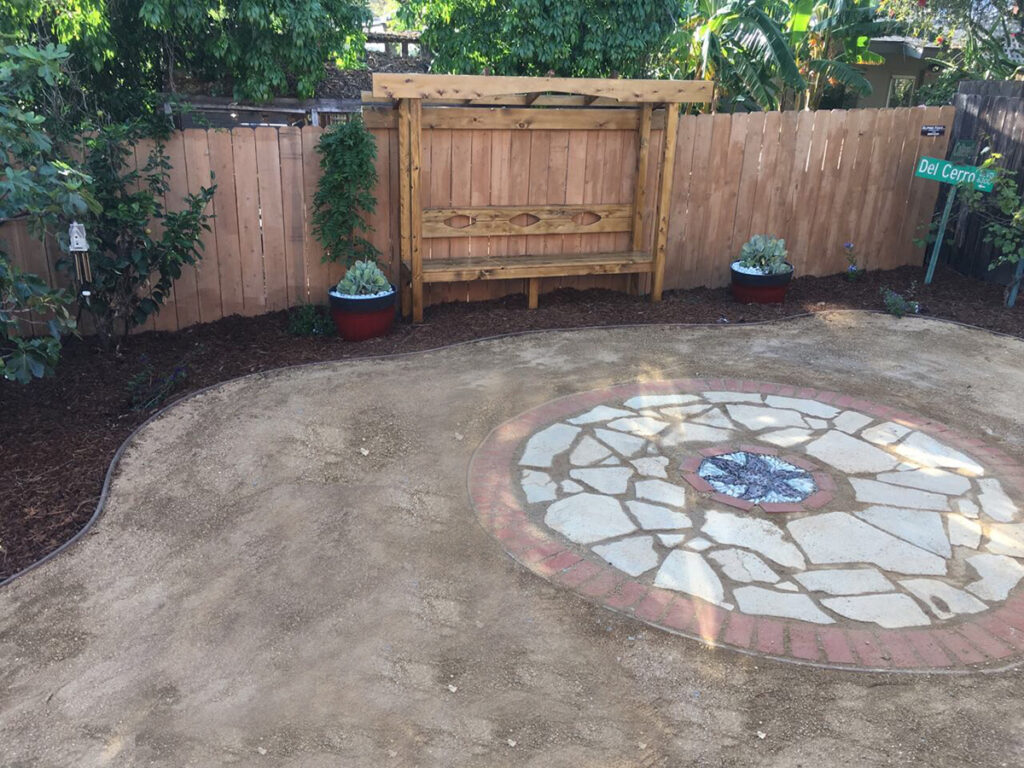
Why have just a bench or just a pergola when you can have both?
This pergola bench is a clear-cut solution for those with a small outdoor space because it doubles as a trellis for your plants and a place to lounge. Moreover, it brings a landscape up a notch and is great for breaking up a long fence or wall as we did here.
One of the best parts, though, is you can personalize your pergola bench. Make it modern by squaring off the pergola, or carve out curves and details to make it classy or cute. You can also bring in your personality by adding whatever cushions make you smile. And, of course, there are the flowers. I planted a pink flowering wisteria here to add some much-needed greenery to the backyard and for foliage that would quickly grow over the top of the pergola. You might also try Bluecrown Passionflower (Passiflora caerulea) for its fruit and its head-turning tendrils or a Star Jasmine (Trachelospermum jasminoides) if you have a shadier yard.
Without further ado, here’s my step-by-step guide to building a pergola bench. (You can also find it on DIY Network!)
MATERIALS
-1 box of 2” deck screws
-1 box of 3” deck screws
-8 1¼” screws
-14 bags of concrete (50 lbs each)
-4 4”x4”x10’ timbers (posts)
-5 2”x4”x8’ timbers (seat frame) -1 2″x4″x10′ (pergola top)
-8 1”x6”x8’ timbers (seat bench & back)
-2 2”x8”x10’ timbers (pergola top)
-stain or paint (optional)
*material sizes and quantities and tools may differ per project
TOOLS
-circular saw or chop saw
-jigsaw
-right angle drill adapter (if building against a fence/wall)
-4 clamps (or use wood supports to plumb posts)
-3’ level
-tape measure
-pencil
-palm sander and sandpaper
-shovel
-paintbrush
Step 1: Pick your location and level it
Select an area that warrants a focal point or that needs to be screened out. Level out the area near and around where you’ll install the bench.
Step 2: Set posts
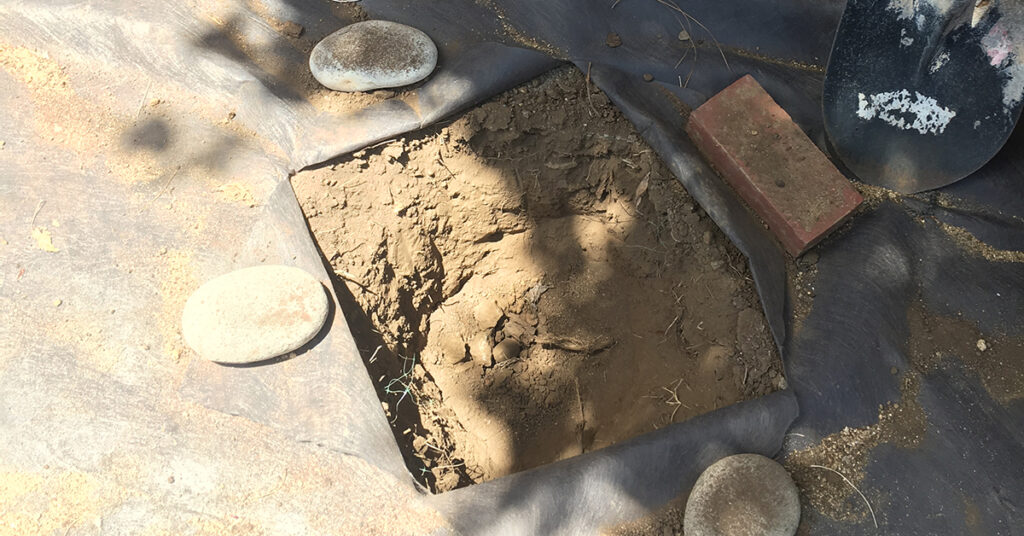
Locate four corner posts for the pergola. Start with the back two posts, spaced 8’ across, outside post to outside post. I chose 8′ so a 1”x6”x8’ seat board will line up with the far end of the posts. Then add the two front posts, spaced ~18″ apart, inside post to inside post. This will house three 1”x6”x8’ timbers for the seat top. Set, level, and plumb the back posts first with a 3’ level, then use clamps to make sure the front posts are spaced 18” apart and plumb to the back posts. Each hole should take about three bags of concrete dug out at 12″ wide and 20″ deep.
Step 3: Build bench frame
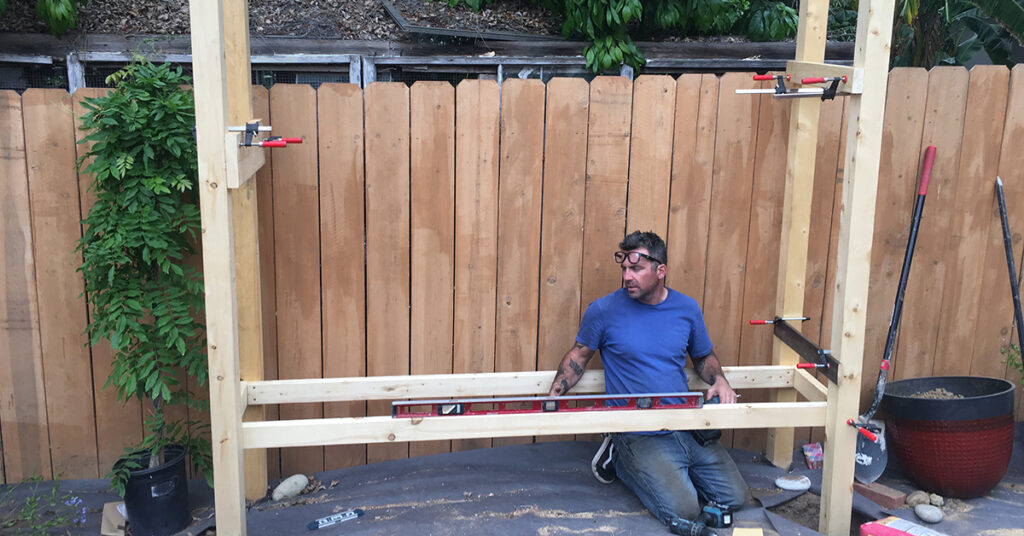
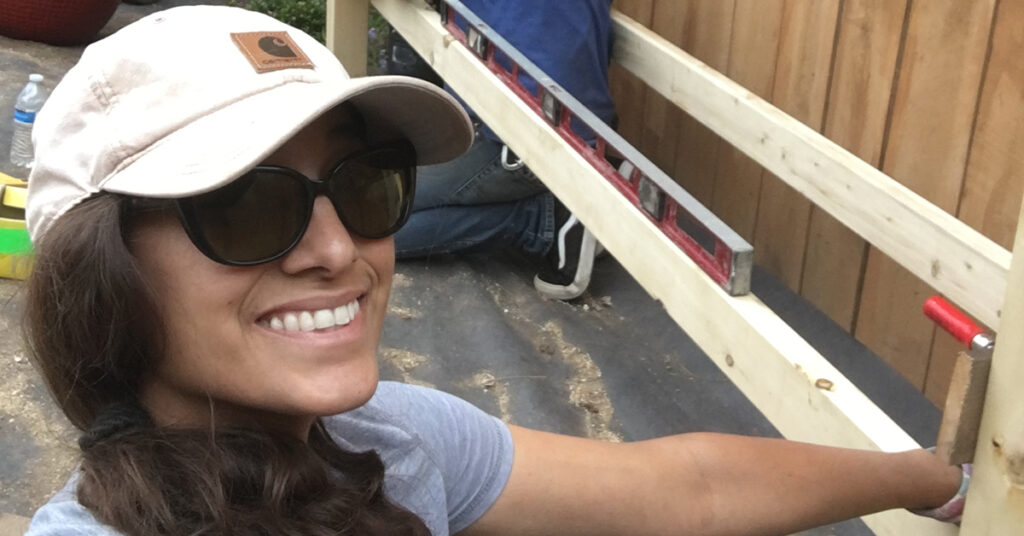
Use a chop or circular saw to cut two 2”x4” timbers to 7’9” and two other 2”x4” timbers to 18” long. Measure 16” up one post from grade. Use a level to mark and secure each 2”x4” to create a box. They should all fit within the frame. Hot tip: If your property has a slight slope, pick the high corner and measure 16” up. Use a level to locate each other 2”x4” timber based on that first post like my buddy John Serbian did here.
Step 4: Add a bench support


Set a 4x4x30” center post about 1’ into a 12”x14” hole and use a 2″x4”x15” timber placed horizontally and lined up with the top of the frame. Cut two more 2”x4’’ timbers to 15” long. Attach two vertically about 2’ in from the end with 3” deck screws. This will add center support so the bench doesn’t sag over time—and so that it can hold all your uncles at once 😉
Step 5: Finish the seating
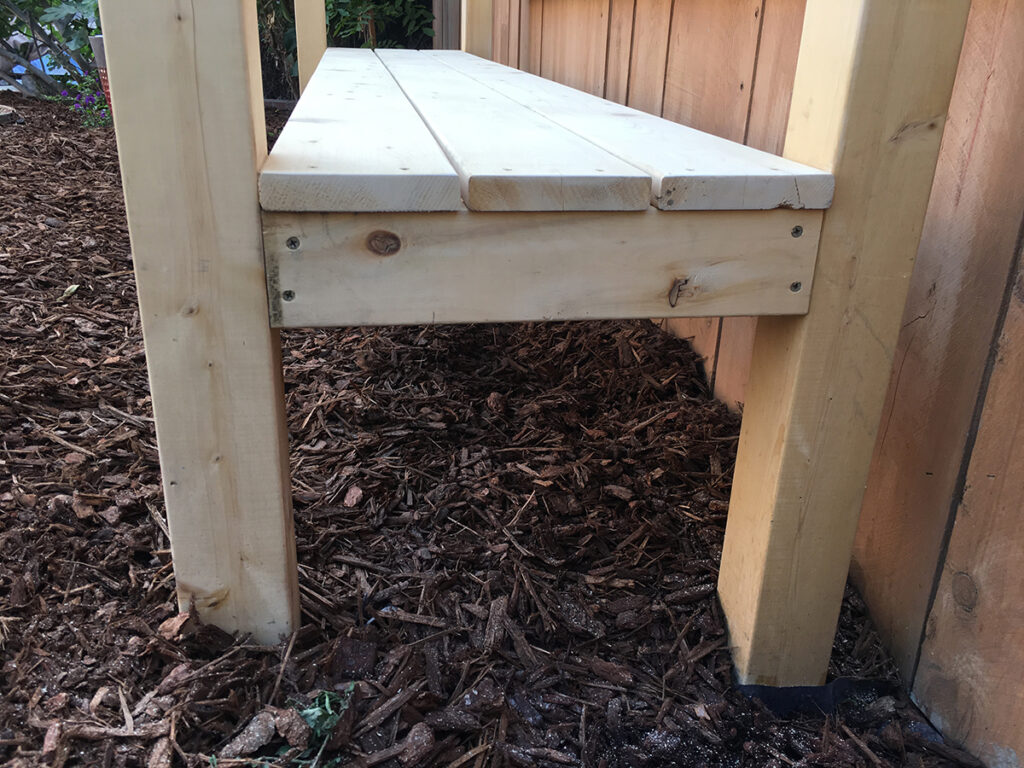
Take the 1”x6”x8’ timber and line up the two end pieces to the 4”x4” posts. Since the 1”x6” timbers are actually around 5.5”, this should leave you with a gap between the boards. Attach 1.5” screws to each end and the center support board.
Step 6: Add a decorative cross beam
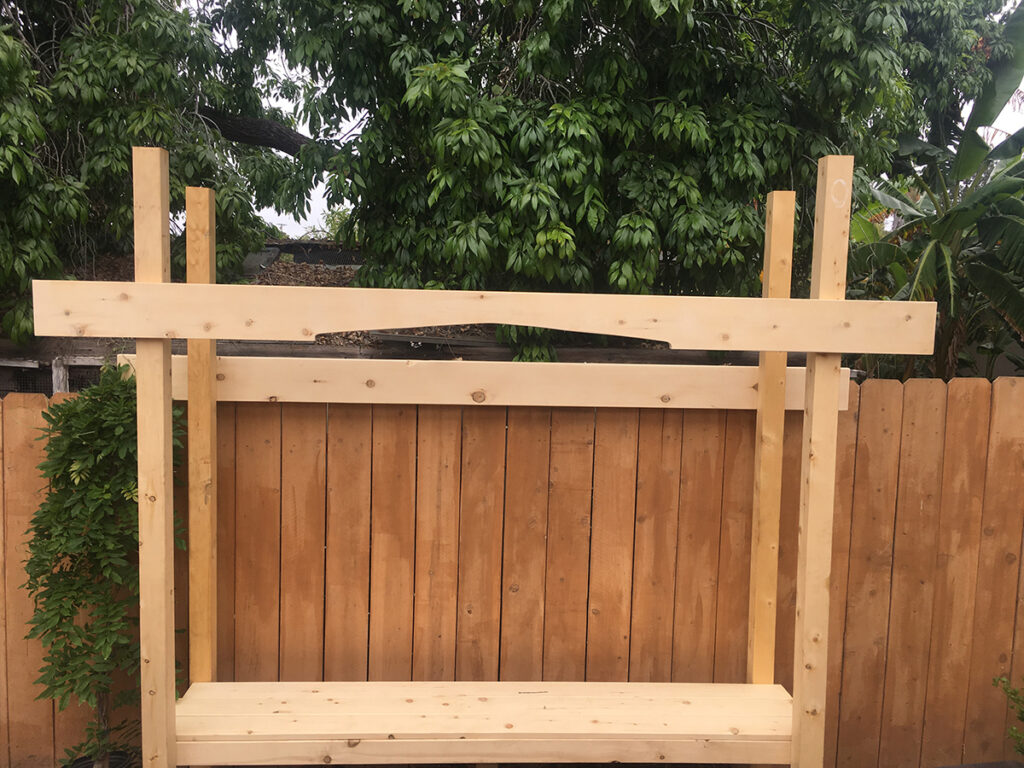
Take one of the 2”x8”x10’ cross beams, and add an optional decorative cut. For this one, we did a rounded triangular void by marking the center of the board 3” up and measuring out 2’ from the center, and marking it ½” up on both sides. Connect the points by measuring a few spots equally on either side, then use a jigsaw to cut out the detail. Attach the beam by measuring up 7’6” on the front post and attach to the posts with 3” deck screws. Take the other 2”x8”x 10’ timber and line it up so that it hides the top of the fence, if you’re placing your bench by one, and attach with screws.
Step 7: Attach the back support—and add decorative details


Clamp your last two 1”x6”x8’ boards together and to the 4”x4” posts. Find a back height that suits you. (Ours starts around 9” up from the seat.) Use a pencil and tape to measure out three 1’-rounded diamond shapes. You can also cut a template out of cardboard and trace it. Clamp down one of the boards, and use a jigsaw to cut out the diamond shapes on each board. If your cuts aren’t perfect don’t worry! You can use an orbital sander to soften and even the cuts.
Step 8: Attach supports and backrests


Line up 1”x6” boards and smooth out any misalignments with a sander. Next, cut two 11″ long pieces of 2”x4” and attach them to the backside of the backrest to stabilize and hold the two 1”x6” timbers together. This helps control warping or pulling apart. Now you’ll want to attach the backrests to the 4″x4″. Since we were up against a fence, we attached ours about 9″ up and with a right angle bit with 1 ¼” screws.
Step 9: Complete the pergola with angled cross beams


Attach the 2”x4”x10’ about 1.5” above the back 2”x8” for additional screening. Then, measure and cut two 2”x4” side supports to fit between the back 2”x4” and the front 2”x8”, and attach to the outside of the 4”x4”s. This will reinforce the top of the pergola. Next, cut three roughly 26.5” center cross beams with top notches. Make sure to measure yours out and use a jigsaw to cut the notch.
Step 10: Put on those finishing touches


Add a stain to protect and enhance the color of the pergola bench. You can also paint it or leave it to weather naturally if it’s cedar, Alaskan yellow cedar, or redwood. I recommend staining or painting any other type of lumber. We added a pink flowering wisteria for additional privacy that will love growing along the top of this structure. Finally, throw on some prefabricated pillows and seat cushions to add a pop of color and personality… and hey, maybe even install a mosaic patio in front of it!